We received tremendous amount of requests to create tutorials on how we create our 3D animations. We are happy to share our first tutorial here today.
Let’s get started!
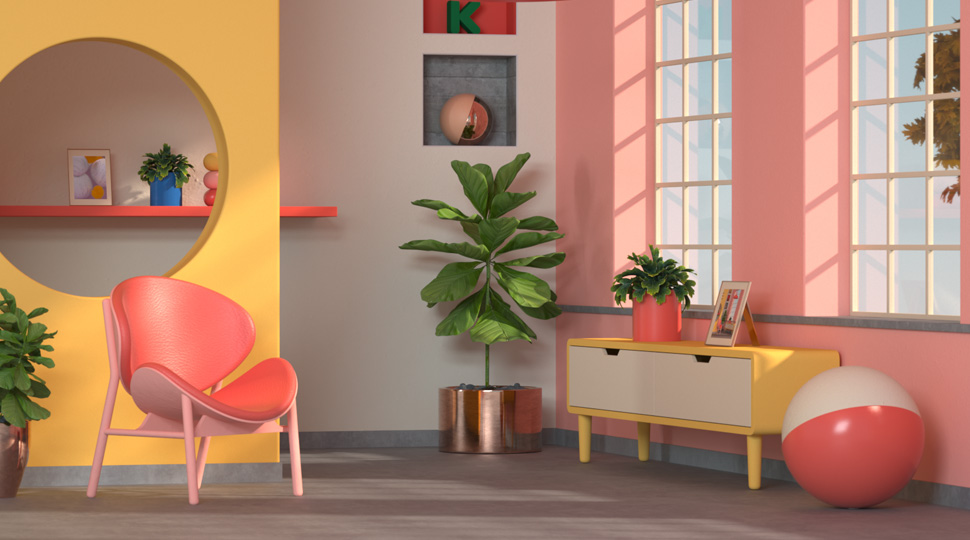
We are going to learn how to setup an octane sun light in order to achieve a realistic, vibrant look and feel.
The setup of the room is important and you should make sure there are enough windows to let the sun light into the room in order to light up everything inside the room. Using the sun light, you can get very nice sharp light shapes on your objects which adds to the realism of the scene.
Let’s get started.
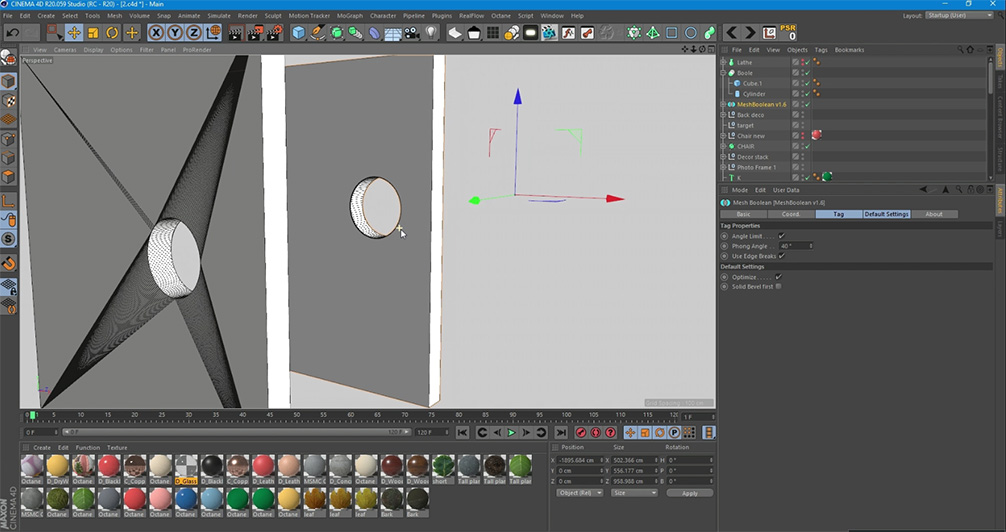
First we have to setup our room. Here I mainly used some pre-made 3D models to decorate my room. Room walls, windows and some minor items are modeled by me.
You can add holes to the walls using Boole, a native tool that comes with the Cinema 4D software. However, if you wish to get nice round edges I’d suggest to use MeshBoolean plugin. It makes the whole process a lot easier.
Materials
Materials and lighting setups are two important parts of a realistic look. The more time you spend on fine tuning your materials, the better result you’d get. However, if your lights are setup wrongly, even having very good detailed materials will not result in a realistic neat render. So, pay attention to both.
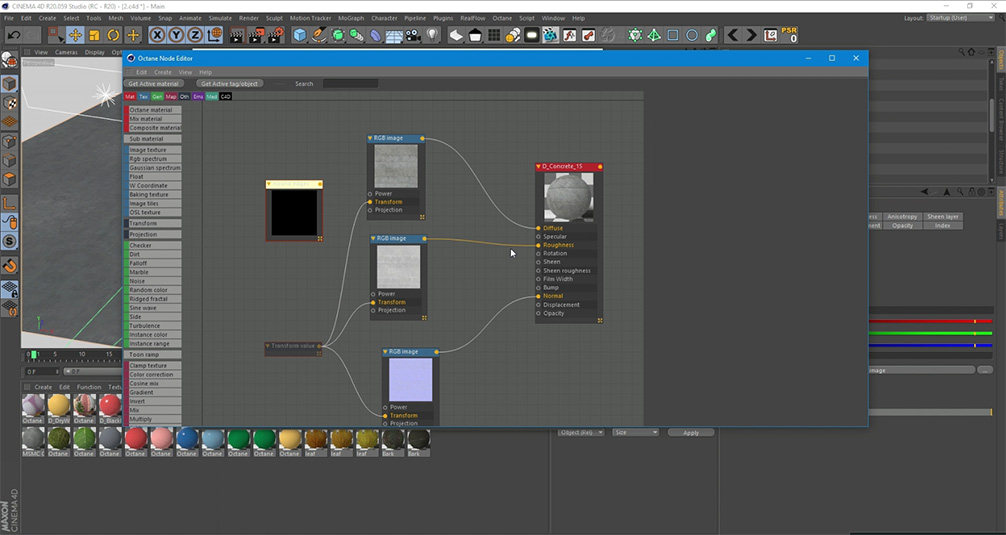
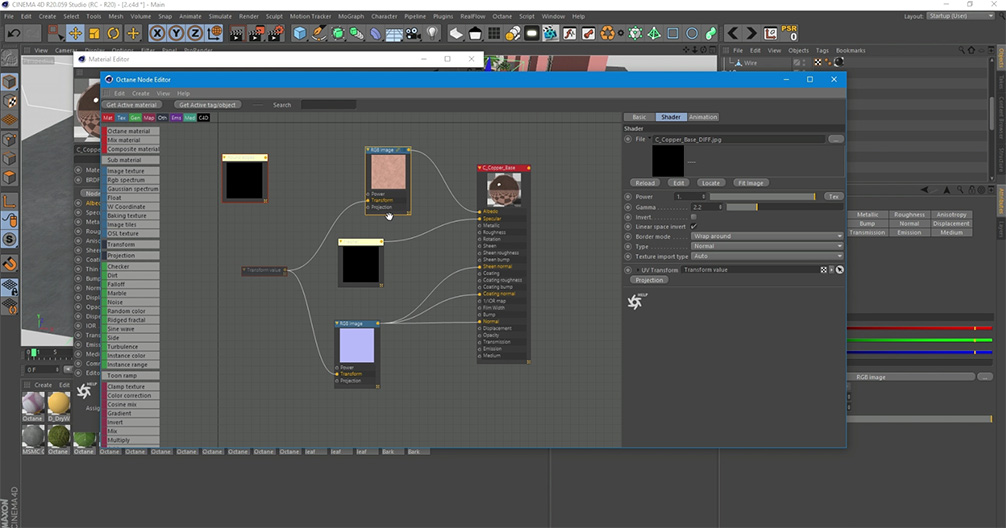
Let’s go through some of the materials that I used for this project. Here is the floor material. Let’s go to node editor to see exactly what’s going on. I definitely suggest using node editor instead of the normal panel as it is a lot easier to tweak and create complex materials.
You can find many concrete textures online on websites such as https://www.textures.com/
They have seamless tiled textures which are an essential part of the job. If by any chance your texture is not tiled, head over to Photoshop and make it tiled yourself. You can do so by using the offset feature.
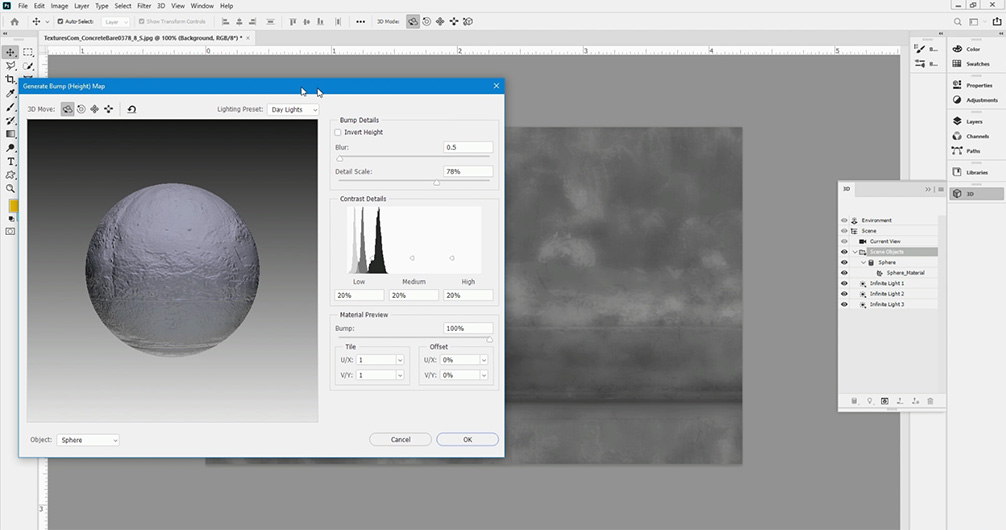
I added roughness and normal map to the material. You can prepare both inside Photoshop. Go to filter > 3D > Generate Bump (Height) Map & Generate Normal Map. It is a very straight forward process and you can tweak it until you are happy with the result.
To cover the shiny materials, let me show you my copper material which I used on a few objects in the scene. It is a Universal Material type with BDRF of GGX. If you are new to Octane materials, you should know there are quite several types of materials included. I personally haven’t used all but I tweak to get the result I need most of the time. Universal so far gave me the best result for shiny materials such as silver, copper, gold etc.
Let’s take a look at the leather material. It is a glossy material using Octane BDRF. A simple leader texture with roughness and normal map. This material is used on the chair.
Let’s check the Glass material now. It is obviously used on the windows so the sun rays pass through it to form a realistic situation. If you use no glass on the windows and let the sun rays to come into your room directly, you will not get this result.
The glass material is made using Specular and Octane BDRF. There Is a scattering node added to the medium and two RGB color nodes added to the absorption and scattering fields. I am going over each to let you see the settings and colors used.
Octane Sunlight Settings
Now that we have covered most important materials in the scene, let’s check the elephant in the room which is the octane sunlight and area lights. I’ve put the sun here and pointed it to the window.
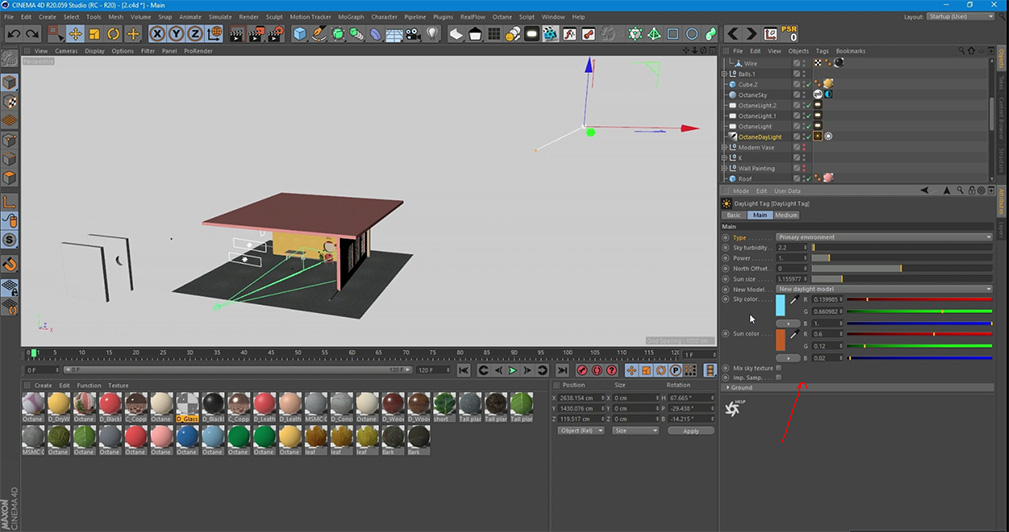
When you create a sun light you will see two tags attached to it. These are the tags you need to tweak to get the desired outcome. Make sure the type is set to primary environment. Sky turbidity I left it at 2.2 default. If you increase the Turbidity number, you will get a hazy look. It is useful for some scenarios I guess.
The Power slider can be used to adjust the strength of the light. This can affect overall contrast and exposure level of the render.
The North offset can be used to adjust the actual North direction of the scene. SUN SIZE controls the radius of the sun. if the radius is big, the shadows become softer. I put it at 5.5.
I used a few Area lights in addition to the sun light. The reason is that the sun light will not be enough to brighten up all the spots. I didn’t adjust anything else other than the power setting in the area lights. You have to experiment with them until you have enough light in your room. Avoid adding too much brightness as it causes burn outs and over-exposures.
Time to check my Octane Camera setup. You have to make sure your camera has Octane tag attached to it. Click on it and you will get a bunch of options. I am using the default settings here in most of my projects. Except when I want to have some specific depth of field, I remove the tick on the Auto Focus and increase the Aspect ratio. Here is how it changes the depth of field in your scene.
Octane Render Settings
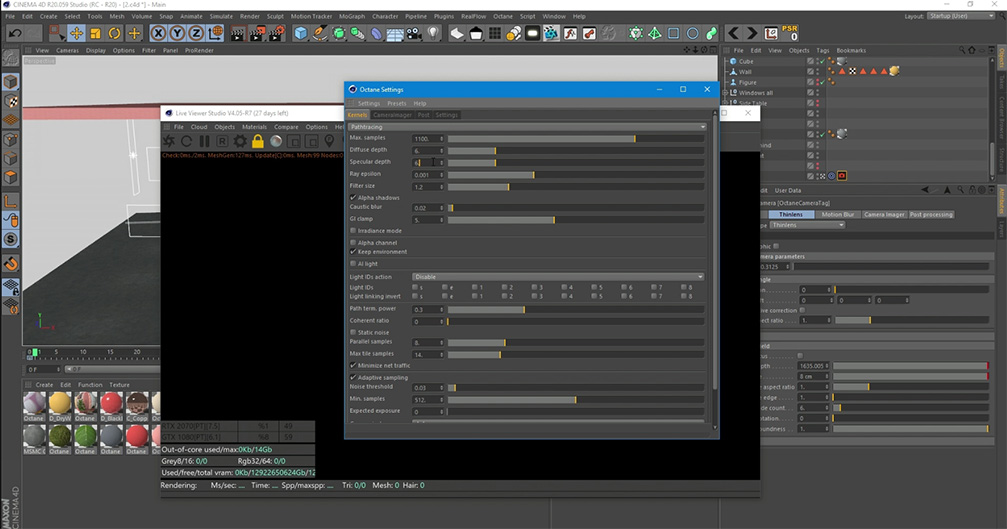
Last but not least. Here are the octane settings that I used for my render. I wanted to render 120 frames so I setup quite low samples. You can go up to 3000 and increase your diffuse depth and specular depth to get even better look but at the expense of your render time.
Denoiser Feature
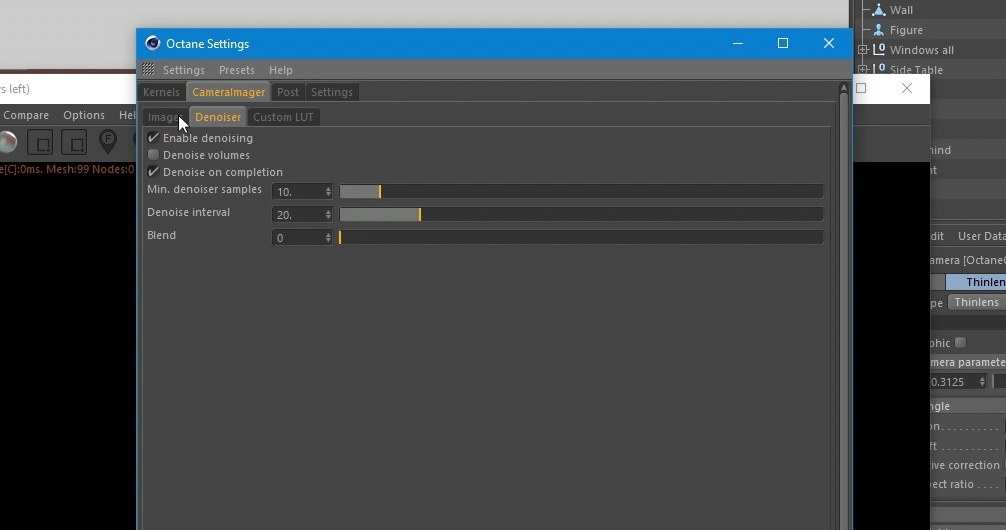
Make sure to leverage the beautiful feature that comes with new octane versions which is called Denoiser. You can find the Denoiser tab within Camera imager tab. I personally haven’t play around much with the setting as the default setting cancels enough amount of noise for me.
I hope this tutorial helps you learn a few useful tips and tricks today. Please subscribe to our Youtube channel for more tutorials and behind the scene videos.
That’s it for today and happy rendering!