What is a 360° (Virtual Reality) Animated Video?
If you haven’t been living in a cave in the past few years, you must know that there is a new immersive technology in the town. The 360° visuals are often accompanied with audio that surrounds the user. Think of it as an altered substituted environment. In order to fully access a VR world, you will need a VR headset (device).
Many brands are producing these VR headsets these days. Oculus, HTC, HP, Valve, Sony, to name a few. I personally use Oculus Quest 2, which is awesome as it is completely wireless and don’t get in your way when immersing yours truly in the 360 degree environment.
Other than using headset, you can also experience the VR (although not perfectly) by using a VR player. Youtube and Vimeo players are both VR enabled. Meaning when you upload a VR video, they automatically identify and present it with VR features to the viewers.
Now that we know what VR is, it’s time to learn how to produce VR animated videos using Cinema 4D, Octane and Adobe After Effects.
Build Your Scene in Full 360°
We have to make sure that every corner is covered with objects, products, elements that we want our viewers to see. If you leave any spot unfilled in your 3D animation scene, the moment viewers turn their head (if wearing headset) or move the mouse around they will see the empty parts and that, my friend, would be quite undesirable.
Let’s say if your scene consists of streets with building, you will have to put more buildings all around the scene to complete a full 360° view. However, this is not applicable to situations where you are just featuring a product preview (phone, car, device, etc).
Now that our scene is ready. It’s time to prepare our VR settings.
Setting Up Octane Camera For 360° Render
Go to your Octane menu and create an Octane camera. Or create a normal camera and apply Octane Camera Tag to it.
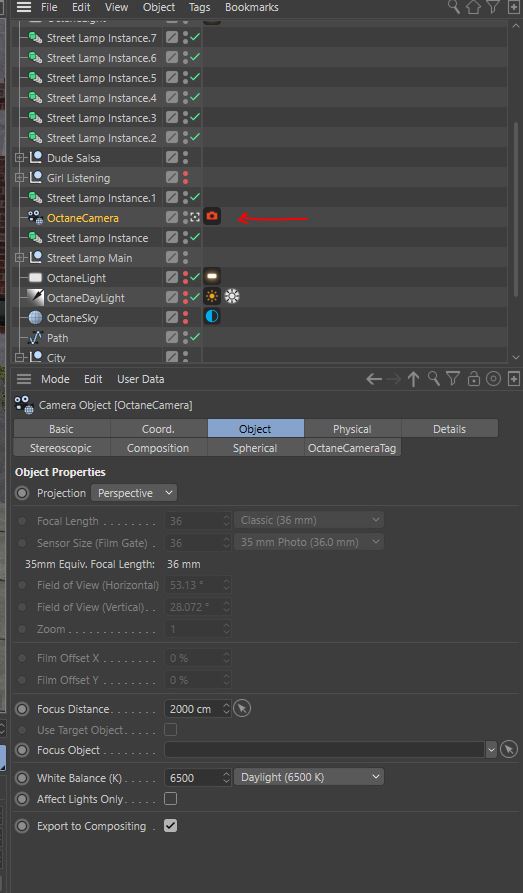
First, select the camera and turn on the “Spherical Camera” option. The rest of the settings must be the same as the screenshot below.
Click on Octane Camera Tag to open Octane settings for the camera. Go to “Panoramic” tab and change the project to “Spherical” as well.
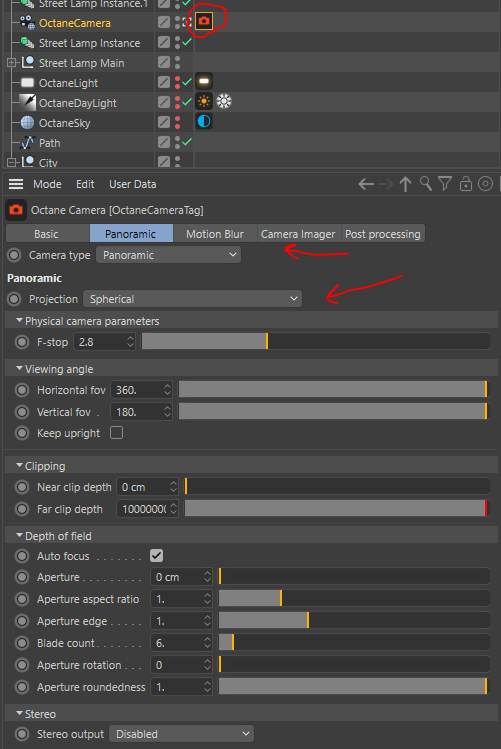
Here, you can set the viewing angle. Horizontal FOV and Vertical FOV seems to stretch the view vertically and horizontally. I’d just leave them as they are.
Find a Spot for Camera
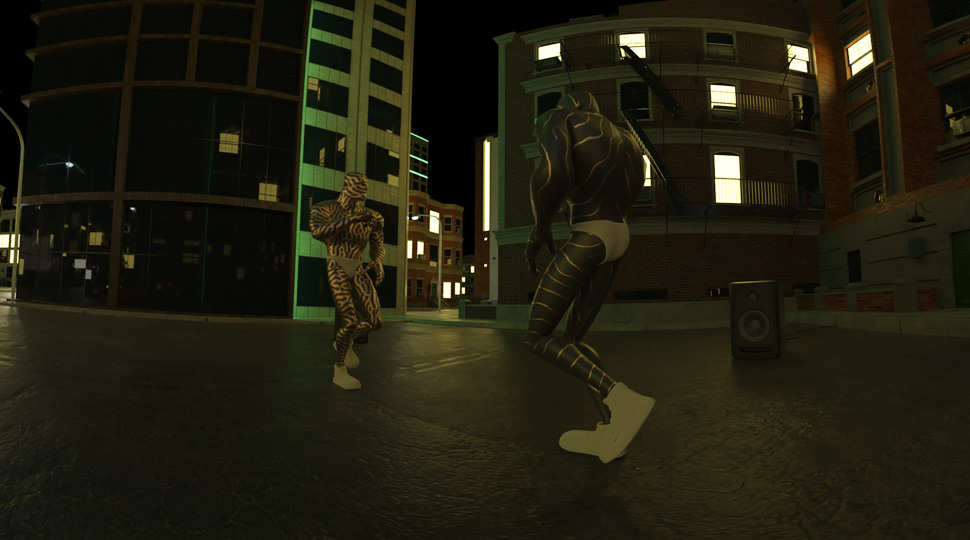
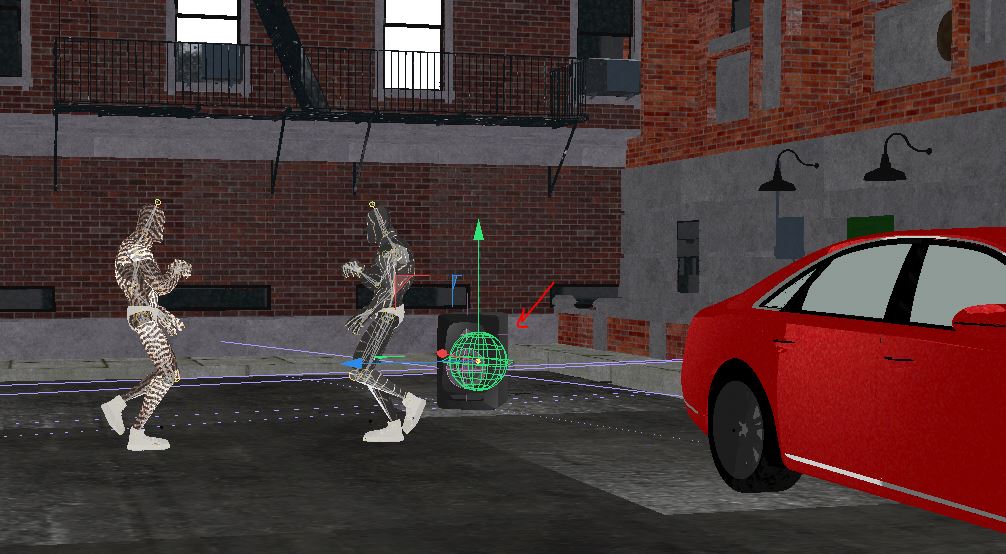
Now you just need to find the right spot for your camera. It is going to be a 360 degree view and viewers can move around to see other parts than where your camera is facing. However, I wanted the viewers to see an interesting visual when the video starts so I placed my camera facing the dancers in my scene.
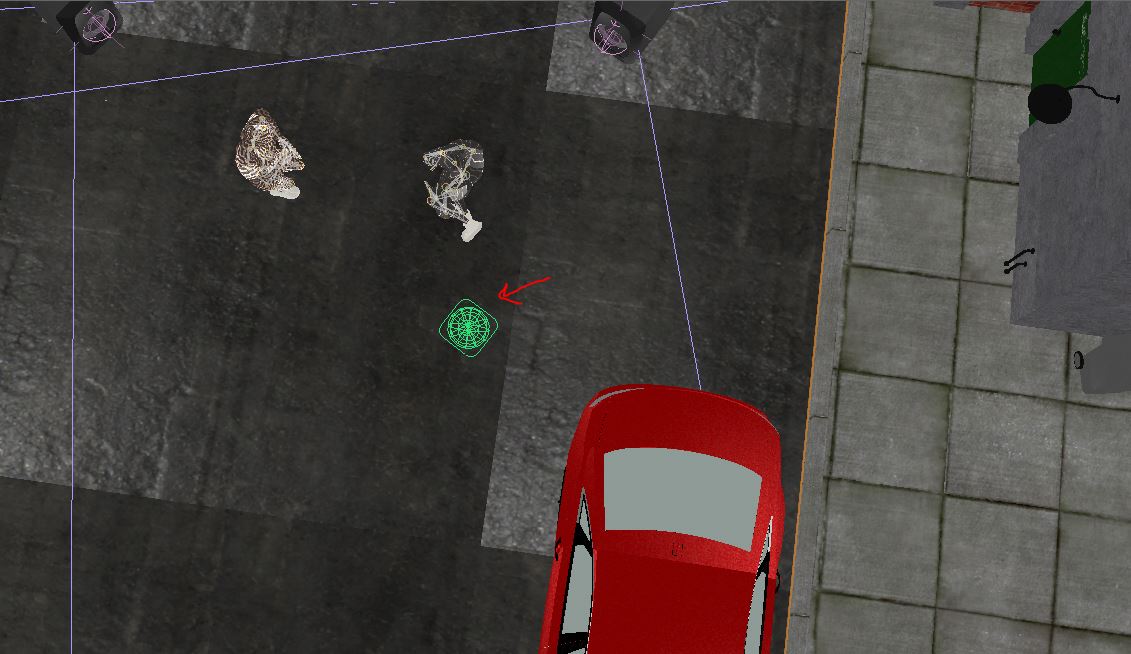
Here is another view showing where my spherical camera is placed:
Cinema 4D Render Settings
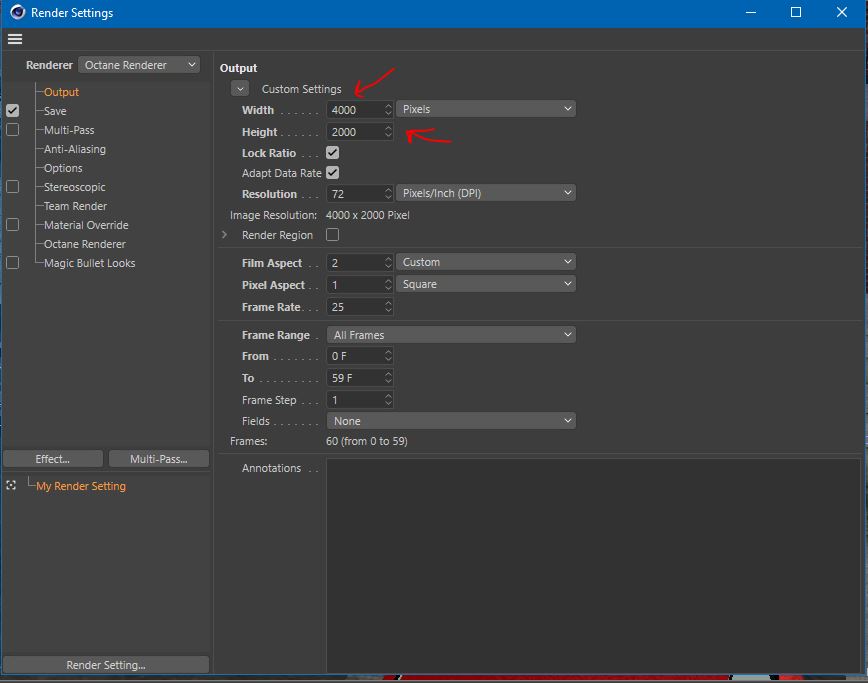
A very important part of the process is here. If you try to render at 1920×1080, the usual full HD resolution, you will get a very low quality VR video once you put it together in Adobe After Effects. The reason is that we are dealing with a 360 degree situation where everything is stretched to fit the entire sphere. So, in order to get a sharp quality, we’ll need to render our scene way bigger. For me, 4000×2000 pixels worked just fine. Here is the screenshot of my settings.
Octane Render Setting
In case you are curious about my Octane render settings (although not relevant to VR), you can find them in the screenshot below:
As you can see, I was going to render in huge resolution of 4000×2000 pixels, so I needed to lower down some of the Octane settings in order to reduce render time. It took around 4 minutes per frame using a RTX3090 graphic card.

Render Time
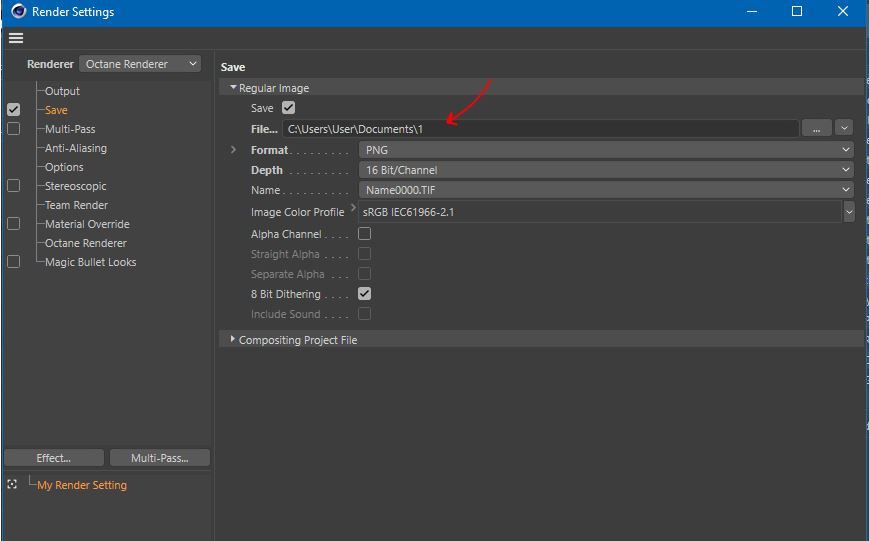
Set the frame range. Then go to Save tab and select your folder destination where the renders will be saved to.
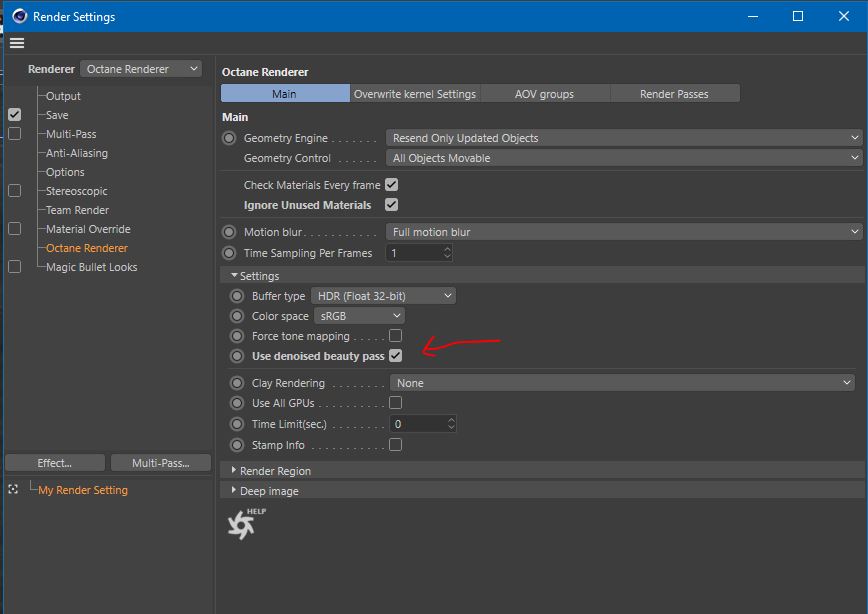
If you want to use the denoising function, select Octane Renderer tab in the left menu and activate “Use Denoised Beauty Pass”. This way, denoised beauty pass will be applied to each of your final renders. You can also render the beauty pass separately in Render Passes tab (top right menu).
If all is good, hit the render. Wait until all sequences are rendered.
Compositing Animated VR Video
Now that our render sequences are ready, we can take them to After Effect to make adjustments (if needed) and render final output in MP4, MOV ProRes etc.
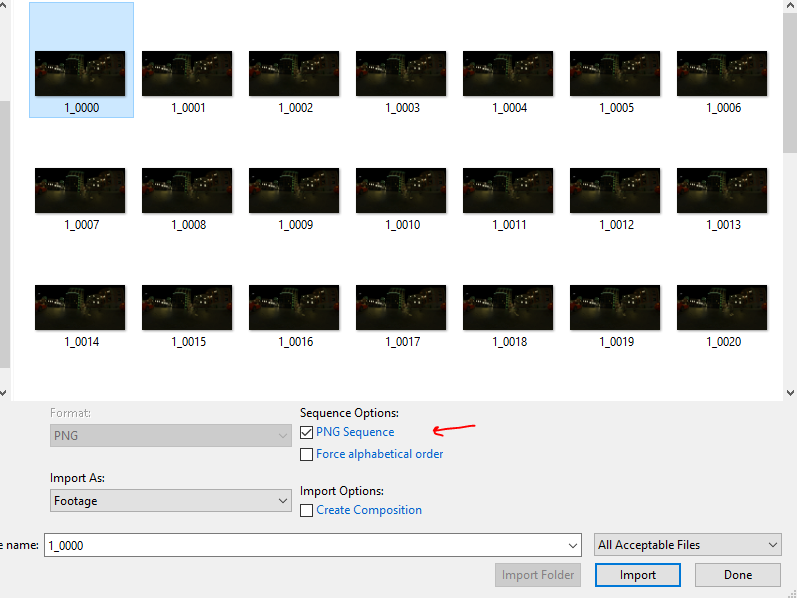
Import Sequences
Go to File > Import > Multiple Files..then select the first file. In Sequence Options, make sure PNG Sequence (or your format name) is selected. Press Import.
VR Comp Editor
Thankfully, Adobe has equipped this software with VR editor in the recent versions. It has a few useful functions that I will explain briefly here.
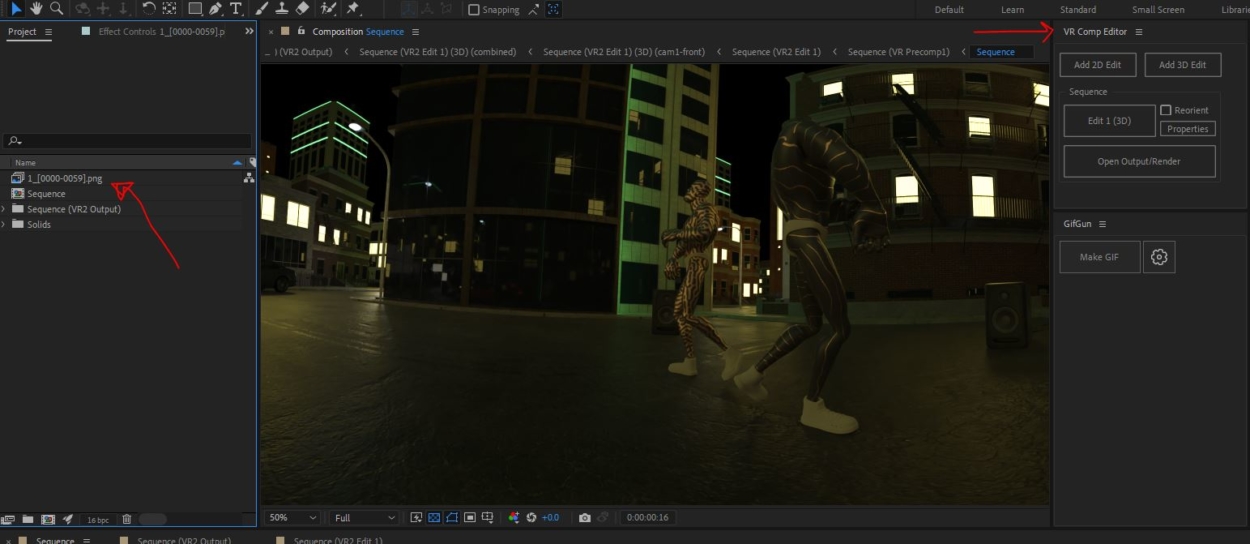
Adding 2D Edit & 3D Edit
Once you click on it, it asks you about the render sequences. Select the name from the dropdown menu. You can set the resolution you want the final output to be in (e.g 1920×1080). You can also set a few other minor camera settings such as selecting 2-node camera, Use 3D null camera control, Center camera etc.
I just left them all in default.Once you click on the Add button, it will create a comp with your VR render sequences and a camera in it. The camera will work just like your Cinema 4D camera here. You can move it around and adjust the angle as you please without the need of going back to Cinema 4D and re-rendering. It is super useful!
Feel free to play around with Editor’s options. I personally haven’t checked everything yet.
Final Render
Once you are done, you can render everything in Media Encoder. Go to Composition > Add to Adobe Media Encoder and click. It will open Media Encoder. In Media Encoder, go to the settings of the video and select “Video is VR”. Then press render. Voila, you are done.
Uploading Animated VR
I had a test with both Youtube and Vimeo. It appears that Youtube processes VR videos much better than Vimeo. My video quality was set to 4K in the Youtube player and it was as sharp as playing it on my PC. On the other hand, the video quality was slightly degraded in Vimeo.
Need A 3D Animation For Your Virtual Reality Project?
We are confident that our 3D animations will blow your mind. Get in touch with our team to arrange for a free consultation here.